7 Best Ways to Select the Right Drag Knife Blade Angle?

Time:2026-10-07 Author:Ethan
0%

Selecting the right drag knife blade angle can determine whether a cut looks clean or slightly torn. The difference may be only a few degrees, yet it affects corners, narrow lettering, and delicate film. This guide explains 7 Best Ways to Select the Right Drag Knife Blade Angle? It focuses on practical checks rather than guesswork.

The central question is simple: How to select the correct blade angle for a drag knife? Start with the material, not the blade package. Vinyl, gasket paper, leather, foam, and thin plastic each resist the blade differently. A 30-degree blade may glide through soft vinyl, while a 60-degree blade may handle thicker stock more effectively. Test cuts provide stronger evidence than assumptions. Inspect the corners under bright light. Look for lifted edges, incomplete cuts, or excessive drag marks.

Small details matter.

Experienced operators also compare manufacturer guidance, blade exposure, cutting speed, and tool pressure. These settings interact, so changing the angle alone may not solve every problem. A dull blade can imitate the symptoms of an incorrect angle. That mistake is common, even in busy workshops. Record the material, angle, pressure, and result after each trial. This simple habit improves repeatability and reduces wasted sheets. The recommendations in this article combine cutting principles, workshop observations, and careful testing. Still, no single angle works perfectly for every machine or material. Recheck the result when conditions change.
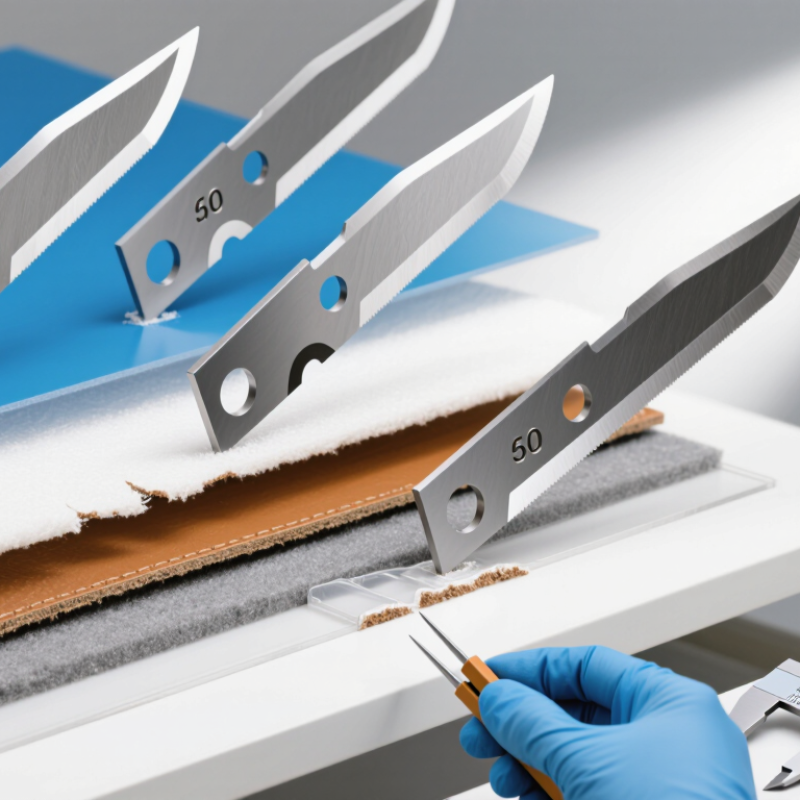
7 Best Ways to Select the Right Drag Knife Blade Angle?

Understand How Drag Knife Blade Angles Affect Cutting Performance

7 Best Ways to Select the Right Drag Knife Blade Angle?

Understand How Drag Knife Blade Angles Affect Cutting Performance

Blade angle controls how the knife enters, turns, and leaves the material. A 30° blade suits thin films and small lettering. A 45° blade offers better control for vinyl, paper, and medium-density sheets. A 60° blade handles thicker laminates and rigid surfaces. These are practical starting points, not fixed rules.

Check seven factors before choosing: material hardness, thickness, adhesive strength, corner detail, cutting speed, downforce, and waste removal. Softer materials often need a sharper angle and lighter pressure. Dense materials may need a wider angle and slower movement. In workshop tests, excessive force caused lifted corners and rough backing cuts. I still find this easy to underestimate.

Industry data supports tighter process control. Smithers’ 2023 report, The Future of Flexible Packaging to 2028, forecasts continued growth in flexible packaging demand, increasing the need for accurate short-run cutting. A 2024 report from Grand View Research also projects steady expansion in the digital printing market, where precise contour cutting is essential. Test a 50-millimeter square first. Inspect the corners under bright light. Record speed, pressure, and blade angle. Then adjust one variable only. That discipline feels slow. It prevents confusing blade problems with machine problems.

Match the Blade Angle to the Material’s Thickness and Toughness

7 Best Ways to Select the Right Drag Knife Blade Angle?

Match the Blade Angle to the Material’s Thickness and Toughness

The correct drag knife angle depends on more than the material name. Thickness and toughness determine how deeply the blade must turn and cut. A thin film may need a smaller angle for clean corners. Thick, resistant sheet often needs a larger angle for better clearance.

Check seven practical details before choosing. Measure the actual material thickness, including liners or coatings. Test whether the surface stretches, tears, or compresses. Observe the cut edge after a slow trial pass. Select a smaller angle for fine lettering and tight curves. Choose a larger angle when thicker stock causes dragging. Consider the blade’s exposed length, because excessive exposure can create rough corners. Match the cutting speed and force to the blade angle, rather than changing the blade alone.

Use a small test square. Watch the corners closely. If they lift, the blade may be too blunt for the material. If the liner shows deep scratches, reduce force or blade exposure. A tough sheet can also twist during cutting, even with a suitable angle. That result does not always mean the blade is wrong; poor hold-down can be the real problem.

Real workshop results can be imperfect. I have seen a theoretically suitable angle leave tiny burrs on a dense sheet. A slower pass improved the edge, but did not solve every corner. Record the material, angle, speed, and pressure after each trial. This simple record makes future selection more reliable.

Choose the Correct Angle for Detailed Shapes and Tight Corners

Choosing the correct drag knife blade angle starts with the material. A 30-degree blade usually follows small lettering and narrow curves cleanly. A 45-degree blade suits common films, paper, and medium-density sheets. A 60-degree blade can handle thicker materials, but it may struggle with tiny corners.

Check seven practical details before cutting. Measure the material thickness. Inspect the smallest shape. Match the blade angle to the tightest corner. Set blade exposure slightly above the material surface. Reduce cutting speed around sharp turns. Confirm the knife offset in the cutting software. Run a small test pattern before committing to the full design.

Watch the waste section closely. A clean corner should look crisp, without lifted edges or short tears. If the blade drags past a corner, the angle, offset, or speed may be wrong. I once increased pressure to fix incomplete cuts, but the extra force distorted several small circles. That was the wrong correction. A fresh blade and slower movement worked better.

For detailed shapes, use a small test square, triangle, and spiral. These reveal different problems quickly. Tight corners need patience. Even a suitable angle can fail when the blade is dull or overexposed. Record the successful settings, but question them when the material changes. Humidity, surface coating, and sheet tension can alter the result.、】【

7 Best Ways to Select the Right Drag Knife Blade Angle

Use this comparison table as a practical starting guide for choosing a drag knife angle for detailed shapes, clean cuts, and tight corners. Actual results depend on blade geometry, material composition, cutting depth, speed, and machine setup.

Selection Method Recommended Blade Angle Typical Material or Condition Why This Angle Works Tight-Corner and Detail Performance Starting Setup Guidance
1. Match the angle to thin, flexible materials 30° Paper, thin adhesive film, lightweight vinyl, and similar materials up to approximately 0.2 mm thick. A lower angle presents a narrower cutting profile and is well suited to shallow cuts through thin stock. Excellent for small lettering, narrow contours, and sharp inside corners when the material is properly supported. Use the lowest force that produces a clean cut. Confirm that the liner or carrier is only lightly scored.
2. Choose a general-purpose angle for everyday work 45° Standard adhesive vinyl, paperboard, label stock, and medium-weight films, commonly around 0.2–0.5 mm thick. The middle angle provides a balanced combination of cutting depth, edge stability, and versatility. Good all-around performance for regular curves, moderate detail, and common corner geometries. Begin with a test cut and adjust force before changing speed. Keep blade exposure only slightly greater than the cut depth.
3. Select a high angle for thicker or tougher materials 60° Thick vinyl, heavy cardstock, stencil film, gasket sheet, and other materials approximately 0.5–1.5 mm thick. The steeper geometry provides additional clearance and cutting reach for thicker materials. Better for deep cuts and dense stock, but very small corners may require slower movement and careful force control. Use a firm cutting mat or stable liner. Reduce speed at tight turns to limit lifting and corner distortion.
4. Prioritize fine detail and small internal features 30°–45° Small text, intricate logos, decorative patterns, and shapes with narrow bridges or internal openings. Lower to mid-range angles reduce the effective cutting footprint and help the blade follow compact contours. Best for details smaller than the main outline, provided the material is thin enough for a shallow clean cut. Reduce cutting speed, verify blade offset, and use a fresh blade. Weed a small sample before running the full design.
5. Account for tight corners and frequent direction changes 30°–45° Star points, small radii, zigzag edges, lettering, and designs with repeated acute-angle turns. Lower angles generally pivot more easily in thin materials, while a 45° angle adds durability for moderate stock. Provides cleaner inside corners than an oversized blade angle when force, speed, and blade offset are correctly calibrated. Use a slow-to-moderate speed and avoid excessive blade exposure. Check that corners are not being overcut or pulled upward.
6. Consider surface hardness and resistance to tearing 45°–60° Coated films, abrasive sheets, dense synthetic materials, rubber-like sheet, and firm laminated stock. A higher angle can improve clearance and reduce drag when the material resists penetration or tends to deform. Suitable for robust outlines and thicker details; extremely small features may still tear if force is too high. Use a sharp blade, make a controlled test cut, and increase force gradually rather than extending the blade excessively.
7. Confirm the choice with a calibrated test cut Test 30°, 45°, then 60° Unfamiliar materials, layered constructions, mixed-thickness jobs, or applications requiring consistent production quality. A test cut reveals the practical balance between penetration, liner protection, edge quality, and blade control. The best angle is the one that cuts the top layer cleanly while preserving small corners and avoiding excessive liner damage. Compare a square, circle, small triangle, and fine lettering. Record angle, force, speed, offset, and material thickness for repeatability.

Important: Blade-angle recommendations are typical starting points, not universal specifications. Always follow the blade and cutter manufacturer’s operating limits, and validate the final settings on the exact material and liner used in production.

Balance Cutting Speed, Pressure, and Blade Angle Settings

7 Best Ways to Select the Right Drag Knife Blade Angle?

Balance Cutting Speed, Pressure, and Blade Angle Settings

A drag knife works best when blade angle, cutting speed, and pressure support each other. A sharper angle can turn tight corners cleanly, but it may require slower movement. A wider angle often handles thicker materials better, although small details can lose definition. Test on the actual material, not only on a sample sheet. Its coating, density, and surface texture can change the result.

I check seven practical points: material thickness, corner detail, blade exposure, cutting speed, downward pressure, test shape, and waste edges.

Start with minimal blade exposure. Increase it gradually until the backing remains intact. Reduce speed when corners lift or curves look jagged. Add pressure only when the blade fails to reach the cut layer. Too much pressure can drag the material and shorten blade life. I once blamed the angle for poor cuts, but the real problem was excessive exposure.

Tips: Cut a small triangle, circle, and square before production. Watch the blade during tight turns. If the material wrinkles, lower pressure first. If fibers remain attached, increase exposure slightly. Record each setting beside the material sample. This simple habit prevents repeated guesswork. Do not chase the fastest setting immediately. A slower, clean cut often reduces waste and rework. Yet, this approach is not perfect; very elastic materials may need several trials before the balance feels stable.

Test, Inspect, and Refine the Blade Angle for Reliable Results

Selecting the right drag knife blade angle starts with the material, not a catalog number. Softer vinyl may cut cleanly with a lower angle, while thick film often needs more clearance. I begin with a small test square and several tight corners. The blade should rotate freely without scraping the holder. Watch the cut edge under bright, angled light. A smooth edge suggests proper alignment. Lift the waste slowly. If corners remain attached, the angle or depth may be wrong. I once blamed the blade for tearing, but excessive pressure caused the problem.

Tips: Test one variable at a time. Keep force modest, then increase it gradually. Mark each test strip with angle, depth, force, and speed. Inspect tiny circles, narrow lettering, and long curves. These details reveal drag more clearly than broad shapes. Check the backing layer, too. A shallow score is safer than cutting through the liner. When the blade leaves whiskers, reduce speed before increasing force. If corners pull upward, inspect the offset and blade condition. A slightly dull blade can imitate a poor angle.

Reliable results come from repeating tests after material changes, temperature shifts, or long cutting sessions. Record what worked, but question old settings. They may only fit yesterday’s sheet. Clean adhesive from the blade tip carefully, then inspect it for chips or uneven wear. Refine the angle in small steps instead of making a dramatic adjustment. The best setting is not always the fastest one. It is the setting that produces clean corners, stable weeding, and an intact backing. Machines help, but close inspection still catches mistakes.

FAQS

How does material thickness affect the correct drag knife blade angle?

Thin films often need a smaller angle for clean corners. Thick sheets usually need a larger angle for clearance. Measure coatings and liners, too.

Which blade angle suits detailed lettering and tight curves?

A smaller angle often follows narrow curves and fine lettering better. Test a small triangle, spiral, and square. Tiny corners expose problems quickly.

When is a larger blade angle useful?

Use a larger angle when thick material drags or resists turning. It may cut dense sheets more freely. Small details can become less precise.

How should blade exposure be adjusted?

Set exposure slightly above the material surface. Excessive exposure can create rough corners and unstable cuts. Deep liner scratches signal too much depth or force.

What should be checked during a test cut?

Watch corners, circles, curves, and the backing layer. Lift the waste slowly. Clean edges are crisp, without lifted sections or short tears.

What does a torn or distorted cut usually indicate?

High pressure, slow turning, or a dull blade may cause distortion. I once blamed the angle, but excessive force caused the damage. That assumption was wrong.

How can cutting speed and force improve results?

Reduce speed near sharp turns. Keep force modest, then increase it gradually. When whiskers appear, try slower movement before adding pressure.

Can poor hold-down imitate an incorrect blade angle?

Yes. Tough sheets can twist during cutting. Weak hold-down may lift corners, even with a suitable angle. The blade may not be the real problem.

What information should be recorded after each trial?

Record material thickness, angle, exposure, speed, and force. Mark each test strip clearly. Old settings may fail after humidity or coating changes.

How should the final setting be judged?

Choose the setting that gives clean corners, easy weeding, and an intact liner. The fastest pass is not always best. Inspect under bright, angled light.

Conclusion

Selecting the right blade angle is essential for achieving clean, consistent cuts with a drag knife. This guide explains how blade angles influence cutting performance, including edge quality, material resistance, and the knife’s ability to turn smoothly. The key question, “How to select the correct blade angle for a drag knife,” depends largely on the material’s thickness, density, and toughness. Softer or thinner materials may require a smaller angle for detail, while thicker or more resistant materials often benefit from a larger angle and greater stability.

The article also explores how blade angle affects intricate shapes, tight corners, cutting speed, and pressure settings. A balanced combination helps prevent tearing, incomplete cuts, and excessive blade wear. Because material behavior can vary, users should test different settings on sample pieces, inspect the results, and refine the angle gradually. Careful adjustment and regular testing provide more reliable performance and help achieve accurate results across a range of cutting tasks.

Ethan

Ethan

Ethan is a seasoned marketing professional with a deep expertise in our company's innovative product line. With a passion for sharing knowledge and insights, he takes the lead in regularly updating our corporate blog, where he explores industry trends, product features, and effective marketing......